
Decorate your hand sculpture like the pros
The ceramic hand sculpture is inherently beautiful. When fully dried, its cool gray-white color complements any interior decor. Unlike plaster sculptures, it doesn't produce dust and won't leave white marks wherever it's placed. However, if you desire, you can also enhance and decorate your creation. Here's how!
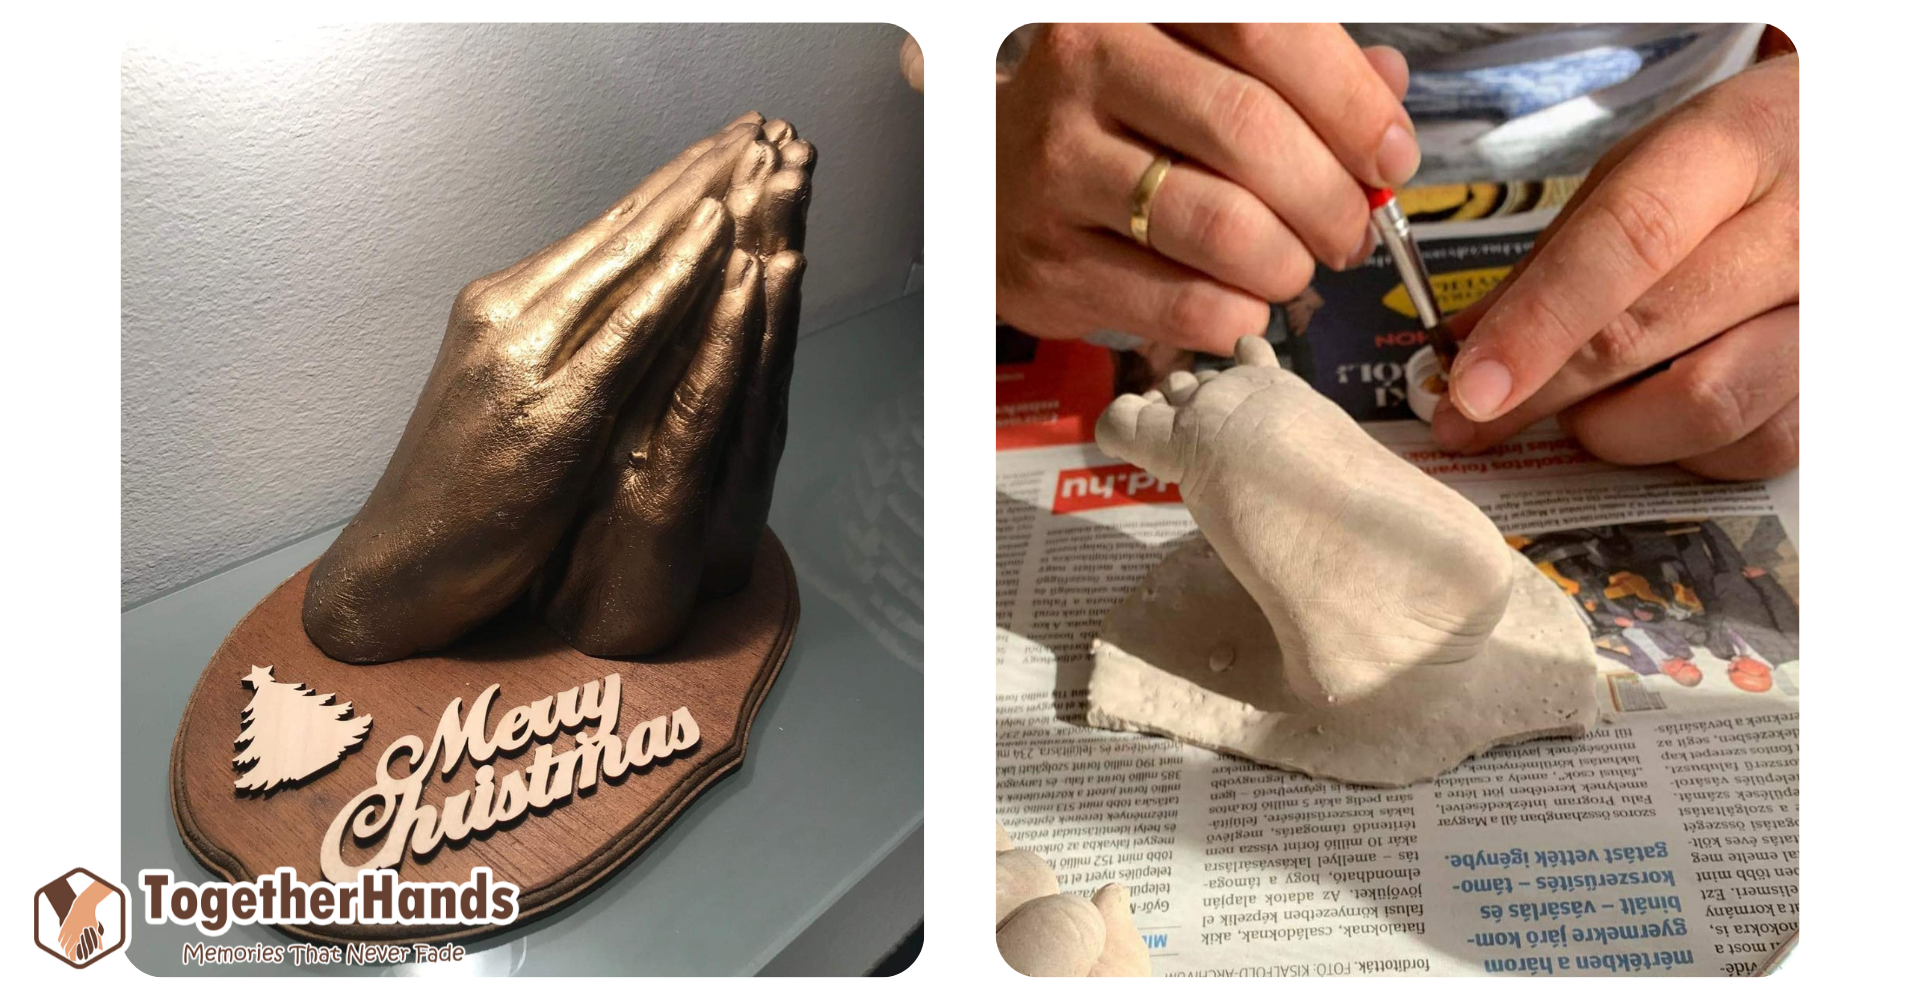
The base
You can place your hand sculpture on any base, like a rustic wooden base board that you can paint, antique, decorate with napkin technique, or label. The only limit to the type of pedestal you choose for your statue is your imagination.
Practical tip: You may need to lightly sand the bottom of the hand sculpture where it meets the base to achieve a perfect fit. If the sculpture wasn't kept perfectly horizontal during drying, or if air bubbles caused unevenness afterward, this simple trick can give your creation a more professional look. Use fine-grit sandpaper gently to smooth out any bumps. Be cautious as sanding will create dust—do it outdoors or on newspaper or paper towels. After sanding, wipe the sanded surface of the hand sculpture with a damp cloth or paper towel to remove excess dust. Forgetting this step could prevent the adhesive from securely fixing your statue to the base.
You'll need a suitable adhesive for attaching the sculpture to the base. Not all adhesives are appropriate for bonding plaster and ceramic objects. In the ÉnSzobrom webshop, you can find glue designed for stable fixing that is suitable even for quickly and permanently reattaching parts that may break off from sculptures.
Varnishing
If you appreciate the natural color of the ceramic powder but want to add a touch of shine, you can use acrylic varnish to embellish your hand sculpture. Any acrylic varnish will work, whether it's a spray-on solution or applied with a brush. You can choose from matte, satin, or glossy finishes. However, ensure that you only apply varnish to the sculpture once it is completely dry.
The fast-drying ceramic powder is typically dry to the touch within 1 hour, allowing you to remove it from the mold. However, depending on the size of the sculpture, it may take an additional 1-2 days to fully dry at room temperature and achieve its final hardness and color (small molds like baby hands may dry in just a few hours).
Attention! Do not varnish your hand sculpture before it is completely dry! Rushing the drying process by using a hot air hair dryer or placing it in an oven can cause cracking. Exercise patience and allow the sculpture to dry naturally.
Painting
Just like varnishing, you can use acrylic paint to decorate your hand sculpture. There are both spray-on and brush versions available. We recommend Pentart acrylic paints for this purpose. These small tubes contain more than enough paint to cover your sculpture thoroughly, and they are available in a variety of colors including metallic shades.
To paint a hand sculpture made from ceramic powder, you do not need to apply a base coat if the sculpture is completely dry. Simply paint directly onto the surface. Ensure that the paint reaches into all the small details and avoid leaving clumps on the surface. You can achieve an elegant look using colors like white, black, silver, and gold. For a more playful appearance, consider using bright colors such as blue, green, yellow, red, orange, or pink.
Extra tip: To add a bit of flair to your sculpture, consider decorating it with paint dots. For this technique, use a different acrylic paint from the base color and a larger brush. Dilute a small amount of paint to a jelly-like consistency in a cap or container. It should not be too thin, as it might run down the sculpture. Dip a larger brush into the diluted paint and gently tap or flick it over the sculpture. The closer you tap, the larger the paint dots will be. This technique works especially well with combinations of black and white paint, but you can also create a cool effect by sprinkling your sculpture with dots of white and colored paint.
Attention! Do not paint your hand sculpture before it is completely dry! Rushing the drying process by using a hot air hair dryer or placing it in an oven can cause cracking. Exercise patience and allow the sculpture to dry naturally.
Antiquing
Antiquing is a method that enhances the appearance of your hand sculpture, emphasizing its grooves and details to create a more realistic and aged look. Here's how you can antique your painted hand sculpture:
Materials Needed:
- Anti-coating paste (optional)
- Black acrylic paint (diluted)
- Sponge
- Water
- Paper towels or soft cloth
- Varnish
Steps:
1. Prepare Your Sculpture:
- Ensure your painted hand sculpture is completely dry before starting the antiquing process.
2. Using Anti-coating Paste (Optional):
- If using anti-coating paste, apply it generously onto a sponge.
- Rub the paste all over the surface of the sculpture, ensuring it gets into all the grooves and details.
- Allow the paste to sit for a moment to settle into the crevices.
3. Wiping Off Excess Paste:
- Wet a clean portion of the sponge or use a new sponge dampened with water.
- Gently wipe away the anti-coating paste from the surface of the sculpture.
- Focus on removing excess paste while leaving some in the grooves to create depth and antiqued effect.
- Continue this process until you achieve the desired level of antiquing.
4. Drying:
- Let the sculpture air dry completely.
5. Applying Varnish:
- Once dry, apply a layer of varnish over the entire surface of the sculpture.
- The varnish will protect the antiqued finish and provide a subtle sheen.
Cracking Varnish for a Rustic Effect
If you desire a rustic, old-fashioned effect for your hand sculpture, consider using cracking varnish:
1. Painting with Base Color:
- After your hand sculpture is completely dry, paint it with a base color such as beige, ivory, or any desired shade.
- Let the base coat dry thoroughly.
2. Applying Cracking Varnish:
- Apply the cracking varnish over the dried base coat using a brush.
- Ensure even coverage over the areas where you want the cracking effect to appear.
- Allow the cracking varnish to dry according to the manufacturer's instructions.
- As it dries, the varnish will crack and create a vintage appearance on the sculpture.
3. Enhancing the Effect:
- Optionally, you can further enhance the cracked effect by lightly sanding the surface after the varnish has dried.
4. Final Touches:
- Once satisfied with the appearance, you may choose to apply additional layers of varnish to seal and protect the sculpture.
Antiquing and using cracking varnish are effective techniques to transform your hand sculpture into a piece with a distinctive, aged aesthetic. Experiment with different methods and colors to achieve the desired vintage look that complements your décor or artistic vision.
Decoupage
Decoupage, often using rice paper or napkins, is a technique commonly used to decorate flat surfaces. However, it can also be applied to the pedestal or even the surface of hand sculptures for a unique decorative effect. Here’s how you can do it:
1. Materials Needed:
- Rice paper or napkin with a small pattern
- Mod Podge or decoupage glue
- Paintbrush
- Scissors
- Sandpaper (optional)
- Varnish (optional)
2. Steps:
- Prepare Your Sculpture: Ensure your hand sculpture is clean and dry.
- Cutting the Pattern: Cut out the desired pattern or motif from the rice paper or napkin. Opt for smaller patterns that can fit well on curved surfaces without distorting too much.
- Applying Glue: Apply a thin layer of Mod Podge or decoupage glue to the area of the sculpture where you want to place the pattern.
- Placing the Paper: Gently place the cut-out pattern onto the glued area. Smooth it out carefully to remove any air bubbles or wrinkles.
- Sealing the Paper: Apply another layer of Mod Podge or decoupage glue over the top of the paper to seal it onto the sculpture. Ensure the edges are well-sealed.
- Drying: Allow the decoupage glue to dry completely according to the product instructions.
- Optional Finishing Touches: If desired, lightly sand the edges of the paper once dry for a smoother finish. Apply a final coat of varnish over the entire surface to protect the decoupage and give it a finished look.
Smart Label
Another creative idea is to add a MemorialTouch sticker to your hand sculpture’s base. This sticker can trigger a personal video message when touched with a smartphone. Here’s how you can incorporate it:
- Obtaining the Sticker: Purchase MemorialTouch sticker from our shop and send us your personal video message.
- Personalization: We will add your personal video message to the sticker.
- Attaching the Sticker: Carefully place the sticker on the base of your hand sculpture. Ensure it is centered and securely adhered.
- Activation: When touched with a smartphone, the sticker will automatically play the recorded video message, creating a unique and interactive element to your hand sculpture.
These creative techniques, whether through decoupage or personalized stickers, offer ways to enhance the visual appeal and personal significance of your hand sculptures, making them memorable and meaningful gifts or décor pieces.